|
A must see infographic about women and cycling! Share these statistics with your next indoor cycling class. And count how many women are sitting on the bikes in front of you! 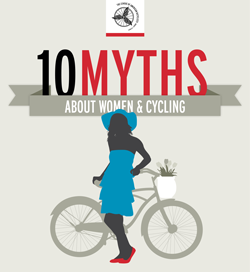
0 Comments
Scanning the internet, books and previous conference notes, reminds me of the many options on setting up indoor cycling bikes for a class. I was working on my PowerPoint slides for the AFLCA cycle designation course I taught today and wanted to dive deeper into the nuts and bolts of set-up. I came across this YouTube video, produce by Star Trac, the bike company that I typically use when I teach. It is very comprehensive and covers the majority of the points needed to set-up the bike. As a quick review, here are some key points:  Saddle Height: A crude estimate can be determined by lining up the saddle with hip bone (top of the iliac crest) or the crease of the flexed hip. I usually have participants sit in the saddle and complete a few revolutions while watching if the hips are rocking excessively. When the foot is extended the knee should be slightly bent, which really means the knee angle is approximately 25-35 degrees. Using a goniometer to measure this angle can be very helpful. Handle Bar Height: As I mentioned in a previous post, hamstring flexibility can help set the handle bar height. Have participants lean forward to the handle bars and set the height at a 45 degree angle from their hips. Beginners are looking for comfort so usually I have them place handle bars at the same height as the saddle. Whereas your experienced or more flexible riders will likely prefer a lower setting for height. Saddle Forward (fore) or Back (aft): Setting this position helps determine the placement of the knee over the pedal. This is where I find there are varying ideas of how to set up the ideal position. If the goal is efficiency and maximal force transfer from the foot to the pedal, participants will want to have the knee positioned directly above the pedal axel. By using a plumb line, there are two current thoughts on what to do: 1. Use a plumb line from superolateral patella/knee to the pedal axel, or 2. use a plumb line from mid-line of patella/knee to line up with the end of the crank arm. To determine the position with either option, look at participant’s leg and imagine a straight line from the knee to pedal axel. If the plumb line is forward (/) over the pedal axel (option 1) or end of crank arm (option 2), the seat needs to be moved backward. Conversely, if the line is backward (\) from the pedal axel (option 1) or end of crank arm (option 2), the seat needs to be moved forward. Handle Bar Forward (fore) or Back (aft): Position will vary due to different torso lengths of participants. By a visual assessment, determine if participant is too far forward to reach the handle bars or too cramped (i.e., elbows hugging body) in their body position. Participants will typically self select the position for comfort. Final Assessment: After all four (or three depending on the bike) variables are set, re-check angle at the knee with goniometer and take long plumb line string and draw a straight line from the hip to the crank to the axel. If there is alignment with all three points on the participant’s body, they are set to ride! For other reviews and/or suggestions on bike set-up, here is a sample of other recommended YouTube videos! As we start back to classes this Fall, this video not only gives me a giddy belly laugh but it also reinforces how as indoor cycling leaders, we need to expect the unexpected in our classes!
I can’t say I ever had an extreme a case as Dwight but I have had some opinionated participants. As leaders, how do we handle these participants? Are they providing friendly, non-threatening suggestions and enthusiasm or are they trying to sabotage your class? It’s those individuals who are positively engaging with you and others in class that you need to take a second look at! In some cases, I think these types of eager participants want to actually be leaders themselves. How do you identify, encourage and foster a new leader? Can you think of a potential new leader? And don’t feel intimidated to suggest they get certified. If I’ve learned anything over ten plus years in this role, is that there are always way more people wanting to get moving than there are leaders and we need each and everyone we can get to lead group exercise. When you’ve found a promising candidate don’t feel intimidated to suggest they get certified. Who knows? Maybe one day they would be a great sub for your class! As a certified leader, is it not also our role to promote our certifications? I challenge you to find at least one participant this session/term to encourage to become certified, but don’t stop there, act as their mentor! The next time a Dwight arrives in our class we embrace him/her and see what he/she can bring to the role of an indoor cycling leader. Let me know when you find your mentee and how it goes! If they are looking to get certified with the AFLCA, I’m facilitating the cycle designation on October 20, 2012 and would love to have them attend! Enjoy the first couple weeks back in the saddle!  I wait every two years for the AFLCA's Fit Rendezvous in Edmonton. Nothing beats the energy of over 500 fitness leaders and trainers getting together to share their love and passion for group fitness. My conference started on the Friday night with the AFLCA trainers’ session on leadership. A future blog post will focus on some of its content but for this post I'd like to reflect on the indoor cycling sessions I attended. To save my legs and let's be honest, my backside, I didn't attend all the indoor cycling sessions, but I'd like to share with you what wisdom I took from the best of the best in indoor cycling instruction!
Effective Pedaling - Suzette O'Byrne The Competitive Team Ride: Indoor Team Training - Krista Popowych Ride One, Get One Free - Helen Vanderburg The Cyclist’s Toolbox: Tools and Techniques to Enhance the Indoor Ride - Suzette O'Byrne Over the past four months I've been able to read bits and pieces about the indoor cycling world...during nap times and early morning feedings (got to love my iPhone!). Shannon Fable recently wrote a great review of what it takes to be an indoor cycling instructor. Take a peek at her blog post on the American Council of Exercise's Fitnovatives Blog.  To summarize, she highlights three main areas where to put your time and energy. Here's my brief input on each point.
1. Education Fitness leadership certification is essential to pursue when wanting to lead an indoor cycling class. In Alberta, the AFLCA is the leading certifying agency that top indoor cycling instructors go to for training. Also, the YMCA (a 'sister' to the AFLCA) provides quality education which can complement the certification requirements of the AFLCA designation. For additional certification and education, many of the indoor bike manufacturers/suppliers provide courses on how to teach indoor cycling classes such as Spinning™, Keiser, and Schwinn®. Most courses are offered outside of Canada but the rare one is available to take locally. 2. Slumdog Millionaire Vs Grease The focus of a good lesson plan (yes, I highly encourage a new lesson plan for each class!) is the HOW and the WHY. How are you leading participants in your class? Can you describe succinctly but with detail that you want participants to do? And then describe in basic terms why you want them to perform these certain drills? Shannon emphasizes the importance of content (i.e., drills and skills) rather than flashy, content poor "bells and whistles". 3. Success for Everyone Indoor cycling classes are appropriate for beginners, older adults, and athletes alike. The challenge is for the leader to adapt their planned workout for all those in attendance. How do you assess your participants and make sure their workout is appropriate? Shannon highlights the importance of coaching. Hands down - good coaching is essential to leading a group and having each individual participant be successful. Take some time to ponder Shannon's suggestions. They are key to hitting the mark as an indoor cycling instructor. 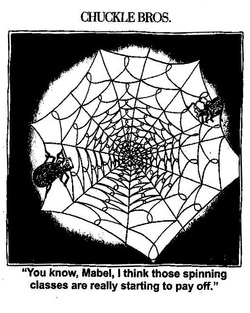 As comical as this above joke is, it really makes me think about spider webs as safety nets. What are the safety nets your facility uses or alternatively, what sort of safety nets do you put in place for yourself?
One of the many roles I have is an AFLCA Trainer of Leaders and I get to observe new AFLCA cycle designation candidates. Recently while observing a new instructor, she demonstrated great care and diligence. She had all participants complete an informed consent and a short medical history to inform her about any health concerns. Smart or what! What waiver does your facility use? Or do you have participants sign a waiver or what about informed consent? And then there are the physical activity readiness questionnaires, where do they fit in? Let’s review what each type of form will provide. Waiver: provide coverage for the facility and associated staff in case of an incident Informed Consent: form outlining the potential risks and benefits to participating in an exercise program PAR-Q: simple screening tool used for participants 15 to 69 years to determine if it is appropriate to start an exercise program PAR-MEDX: medical clearance form that must be provided to participants who answer questions positively on the PAR-Q. This form is completed by the participant’s physician. PAR-MEDX for pregnancy: medical clearance form that must be completed by all pregnant women by their physician before participating in exercise program These forms are all examples of safety nets. Ideally, having one or more of the forms completed by participants will demonstrate that you value your participants’ health and safety. As well, in some cases it may also protect you in an event of an incident. What other communications tools can you use to keep your participants safe? Do you ever ask who is a new participant at the beginning of class or inquire with participants about anyone have any medical conditions you should be aware of? These types of questions can provide some valuable verbal information about who is participating in your class and better enabling you to provide an appropriate class (i.e., suitable intensity, drill types, etc.). It is just another way to avoid having any incidents during your class. In the past couple years, “safety nets” have become more common such that U of A Campus Recreation program has now implemented waivers for all participants who partake in group fitness classes. Take a look at their form for an example. What are the ways you protect your participants and yourself in your indoor cycling classes? What is your “spider web”? Keeping your spin bikes in tip top shape is key for the participant experience. No one ever appreciates a squeaky bike! A recent post on Fitnet.ca discusses the how-to on brake pads. Check out their YouTube video too! It may not be part of your formal job description but having some idea about how indoor cycling bikes work is always good to have in your back pocket!
 University of Alberta's Campus Recreation will be hosting an AFLCA cycle designation course on Saturday June 4 and I will be the facilitator!
Pass on the word! Click here for more information. 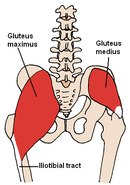 How strong is your gluteus medius muscles? Need your anatomy textbook to remind you what muscle that is? Well, let me refresh your memory...it is a one of the three gluteal muscles that is situated on the outer surface of the pelvis. It abducts the hip (moves the leg away from the body). I have always wanted to have a biomechanics assessment. Weird you may think but with my history of musculoskeletal injury...I could fill this blog post! Last year, my chiropractor told me of a new service at his clinic - Biomechanical Assessment. He encouraged me to consider making an appointment as to review my riding technique. I jumped at the chance to have another set of eyes review my cycling biomechanics, even though I've got many sets of eyes on me each week at class! Brian, the biomechanical analyst, had me cycle (and chat - I couldn't resist) and he videotaped my technique. Can you see what's wrong in this video? I had known going in that my gluteus medius had been a problem particularly on my left side. Muscular weakness! Not really thinking it through I hadn't realized that my weakness would be that clear on the video. And that it would show up with an internal rotation of my left femur at the hip joint. Knocking knees my friends. If you look carefully, it is mostly occurring on final phases of my pedal upstroke and transition into the down stroke. Who knew...well, maybe I should have as I yell and rave at cycle participants about keeping their knees facing forward! Do you cue contraction of gluteus medius? Are your cycle participants knocking their knees? It tends to be a problem especially for women. That is not really a surprise. With a wider pelvis, women are more prone to fall into this form. The Q angle is greater than men and thus forces the knee into a Genu valgum position. With weak gluteus medius muscles, research has shown that is position puts the knees at greater risk for injury and pain! Now take a second look. Improved? Yes! Did Brian have me doing something different with both my mind and body? Yes!
His recommendation was to bring my knees out such that they felt way too wide. I felt like I was cycling around a barrel but truly it was the right technique. Lesson learned? In your next class, take a look at your cycle participants’ alignment. Can you provide them some cueing that will enforce proper riding technique? I’ve been working on a workshop for the upcoming 11th Annual YMCA Spring Training Conference on reinventing your spin classes and a word keeps coming up as I put it together: creativity. A colleague and friend of mine forwarded me this and wondered what thought! Take a peak! Not to give away what’s in store for the upcoming workshop, what can we learn from these daring acts on the bike? Let’s put on our creativity hats...
· A couple words come to mind – enthusiasm and energy. How do you bring these two attributes to your classes? · The use of percussion and sound cues with clapping. The individuals are using clapping to set the rhythm and beat in the song. Could you add another layer of cuing to the music you use? · Pedal cadence is consistent with the beats per minute (bpm) in each song. For example, in the first video, the song is 150 bpm and the cyclist is pedalling between 75-80 rpm. Look at how effective the music is setting the intensity and pace. Do you use the bpm of your songs to dictate cadence in your classes? · Synchronization! Matching partner or group leg movements were set. This is a great way to foster teamwork in your class. How could you promote synchronization in your classes? · It is all about taking your cycle participants out of the norm for a spin class. How can you do this? Well, bike placement might just do it. The second video demonstrates a pace line option. Now, I don’t recommend the bounding over the bikes, but perhaps this could be the inspiration for participants rotate through bikes in a safer way? How can you shake it up for your cycle participants? · Just like a round in music (two or more voices sing exactly the same melody, starting at different times), the cyclists in the second video glide into a round on the bike when each move from sitting to standing starting at the next phrase in the racing music. When can you include a round in your drills? · Did you catch the theme in the last video? Kevin Bacon in a tight white shirt and jeans bring anything to mind? The cyclists are ‘dancing’ to the song Footloose on their bikes. Decked out in tight white shirts (minus jeans of course) and tapping their feet just like some of the moves from the movie. Now it maybe that we won’t ‘dance’ on the bike (although that might even be something to consider) but think about themes for you classes. What themes would interest your cycle participants? Now I would be neglectful if I did not mention that some of these moves are not particularly safe for many (if not all) of our cycle participants. Uncontrolled high cadence, lifting the stationary bike off the ground, standing on the handle bars, uncontrolled single leg work, the v-sit on the saddle, and clap push ups are not recommended in a regular spin class. So maybe don’t try this at home or in the studio with participants. Let’s look at these videos more as a spectacle versus functional training, but anything can be the inspiration for a great spin class! Keep creative! |
Workman's Cycle Drills & Skills
Enjoy some of my favorite cycle workout drills either in a cycle class or on your own bike at home! Archives
September 2013
Categories
All
|
 RSS Feed