|
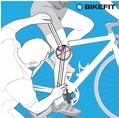
Scanning the internet, books and previous conference notes, reminds me of the many options on setting up indoor cycling bikes for a class. I was working on my PowerPoint slides for the AFLCA cycle designation course I taught today and wanted to dive deeper into the nuts and bolts of set-up. I came across this YouTube video, produce by Star Trac, the bike company that I typically use when I teach. It is very comprehensive and covers the majority of the points needed to set-up the bike. As a quick review, here are some key points:  Saddle Height: A crude estimate can be determined by lining up the saddle with hip bone (top of the iliac crest) or the crease of the flexed hip. I usually have participants sit in the saddle and complete a few revolutions while watching if the hips are rocking excessively. When the foot is extended the knee should be slightly bent, which really means the knee angle is approximately 25-35 degrees. Using a goniometer to measure this angle can be very helpful. Handle Bar Height: As I mentioned in a previous post, hamstring flexibility can help set the handle bar height. Have participants lean forward to the handle bars and set the height at a 45 degree angle from their hips. Beginners are looking for comfort so usually I have them place handle bars at the same height as the saddle. Whereas your experienced or more flexible riders will likely prefer a lower setting for height. Saddle Forward (fore) or Back (aft): Setting this position helps determine the placement of the knee over the pedal. This is where I find there are varying ideas of how to set up the ideal position. If the goal is efficiency and maximal force transfer from the foot to the pedal, participants will want to have the knee positioned directly above the pedal axel. By using a plumb line, there are two current thoughts on what to do: 1. Use a plumb line from superolateral patella/knee to the pedal axel, or 2. use a plumb line from mid-line of patella/knee to line up with the end of the crank arm. To determine the position with either option, look at participant’s leg and imagine a straight line from the knee to pedal axel. If the plumb line is forward (/) over the pedal axel (option 1) or end of crank arm (option 2), the seat needs to be moved backward. Conversely, if the line is backward (\) from the pedal axel (option 1) or end of crank arm (option 2), the seat needs to be moved forward. Handle Bar Forward (fore) or Back (aft): Position will vary due to different torso lengths of participants. By a visual assessment, determine if participant is too far forward to reach the handle bars or too cramped (i.e., elbows hugging body) in their body position. Participants will typically self select the position for comfort. Final Assessment: After all four (or three depending on the bike) variables are set, re-check angle at the knee with goniometer and take long plumb line string and draw a straight line from the hip to the crank to the axel. If there is alignment with all three points on the participant’s body, they are set to ride! For other reviews and/or suggestions on bike set-up, here is a sample of other recommended YouTube videos!
6 Comments
Crystal Surface
10/22/2012 01:48:09 am
Hi Lisa, I was able to download your slides but I tried to save your Cycle drills and its all mumble jumble. Is there an easy way to save your drills and these videos on this site. I would like to be able to access them any time. I won't be buying my bikes for another month or so and I might forget by that time. Thanks and by the way my bum feels bruised lol
Reply
Hi Crystal, Great question! The blog content will be posted on my website for a long time (access it whenever you`d like) whereas I take down the PowerPoint slides after about a month. My best suggestion would be to add you to my monthly newsletter mailout which always has a link to my blog. Would you like me to add your contact information? It might then be a reminder to check my blog again for new and old content. Also, please let me know if there is something specific (e.g., a specific post) and I could send you the information in a PDF if you`d like.
Reply
Lisa A. Workman
9/11/2015 08:46:10 pm
Excellent Debra! I'm glad this post was helpful for you!
Reply
Lisa
3/21/2016 11:48:25 am
Great! Thanks Jemmy - glad you liked the post!
Reply
Leave a Reply. |
Workman's Cycle Drills & Skills
Enjoy some of my favorite cycle workout drills either in a cycle class or on your own bike at home! Archives
September 2013
Categories
All
|
Edmonton, Alberta
 RSS Feed