|
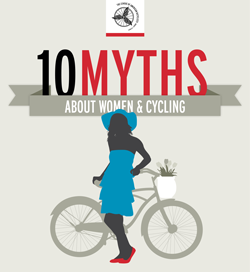
A must see infographic about women and cycling! Share these statistics with your next indoor cycling class. And count how many women are sitting on the bikes in front of you!
0 Comments
It has been more difficult to blog this Fall and I am really missing teaching a regular class. It is amazing how much inspiration (and perspiration!) comes with teaching. It is my hope that 2013 will allow for more time to get to my editorial calendar. I've got posts just waiting to be written!
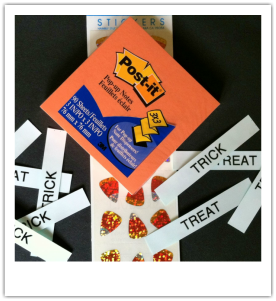
From my family to yours, Merry Christmas and a Happy New Year! Lisa Thanks Nora, for sharing this cute video on how women in France ride bikes to burn calories! Now how do we bring this to Canada... Have you ever attended an indoor cycling class where someone was wearing a wig, or a tiara, or even a cape? Well, I have and I encouraged it! Yes folks, it's that time of year again when adults get to play dress up, at least in my classes, and we play Thriller by MJ for the whole class! What will you do with your class this year? Here's one idea (want more ideas? Check out my previous posts here and here on Halloween games) using homemade Trick or Treat cards. This is an easy way to incorporate “tricks” (i.e., challenging drills) and “treats” (i.e., easier drills). Simply have participants pick a card, either trick or treat, and the predetermined drill assigned to that card will dictate what drill is performed. I’ve decided to have six possible tricks and three possible treats. Possible Tricks: 1. Two minutes of jumps with 30 second break; repeat two to three times 2. Two one minute standing hill climbs and a couple two minute standing hill climbs; 15 second recovery between each climb 3. Five one minute sprints with 30 seconds recovery between each sprint 4. 15 squats off the bike followed by one minute of seated hill climb; repeat two times (be watchful of participants’ footwear particularly if they are wearing cycling cleats) 5. 10 sprints for 15 seconds. Recover for 45 seconds. 6. Attack the pack power! Six intervals of seated power for 30 seconds, recover for 30 seconds Possible Treats: 1. Standing jog/ride for two minutes 2. Meet your neighbor spin out. Participants discuss best and worst Halloween costume they ever wore for three minutes. 3. Steady time trial pace for six minutes singing to the song everyone knows the words to, Thriller (the album version is 5:58) After you've constructed your family’s costumes and your Halloween decorations, it's easy to whip up these trick or treat cards. Here's how I did it:
Step one: collect crafty items such orange post-it notes, black card stock, "trick" (6) and "treat" (3) labels, and fun Halloween pictures or stickers. Scanning the internet, books and previous conference notes, reminds me of the many options on setting up indoor cycling bikes for a class. I was working on my PowerPoint slides for the AFLCA cycle designation course I taught today and wanted to dive deeper into the nuts and bolts of set-up. I came across this YouTube video, produce by Star Trac, the bike company that I typically use when I teach. It is very comprehensive and covers the majority of the points needed to set-up the bike. As a quick review, here are some key points: 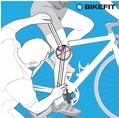 Saddle Height: A crude estimate can be determined by lining up the saddle with hip bone (top of the iliac crest) or the crease of the flexed hip. I usually have participants sit in the saddle and complete a few revolutions while watching if the hips are rocking excessively. When the foot is extended the knee should be slightly bent, which really means the knee angle is approximately 25-35 degrees. Using a goniometer to measure this angle can be very helpful. Handle Bar Height: As I mentioned in a previous post, hamstring flexibility can help set the handle bar height. Have participants lean forward to the handle bars and set the height at a 45 degree angle from their hips. Beginners are looking for comfort so usually I have them place handle bars at the same height as the saddle. Whereas your experienced or more flexible riders will likely prefer a lower setting for height. Saddle Forward (fore) or Back (aft): Setting this position helps determine the placement of the knee over the pedal. This is where I find there are varying ideas of how to set up the ideal position. If the goal is efficiency and maximal force transfer from the foot to the pedal, participants will want to have the knee positioned directly above the pedal axel. By using a plumb line, there are two current thoughts on what to do: 1. Use a plumb line from superolateral patella/knee to the pedal axel, or 2. use a plumb line from mid-line of patella/knee to line up with the end of the crank arm. To determine the position with either option, look at participant’s leg and imagine a straight line from the knee to pedal axel. If the plumb line is forward (/) over the pedal axel (option 1) or end of crank arm (option 2), the seat needs to be moved backward. Conversely, if the line is backward (\) from the pedal axel (option 1) or end of crank arm (option 2), the seat needs to be moved forward. Handle Bar Forward (fore) or Back (aft): Position will vary due to different torso lengths of participants. By a visual assessment, determine if participant is too far forward to reach the handle bars or too cramped (i.e., elbows hugging body) in their body position. Participants will typically self select the position for comfort. Final Assessment: After all four (or three depending on the bike) variables are set, re-check angle at the knee with goniometer and take long plumb line string and draw a straight line from the hip to the crank to the axel. If there is alignment with all three points on the participant’s body, they are set to ride! For other reviews and/or suggestions on bike set-up, here is a sample of other recommended YouTube videos! In my previous post on using the energy systems in your indoor cycling class, I discussed the aerobic energy system and provided a drill that would challenge your participants’ aerobic power. Now continuing down the list of energy systems most used in spin, the focus shifts to the first of the two anaerobic, or short duration, energy systems. This post will focus on the anaerobic lactic (also called glycolytic) system.
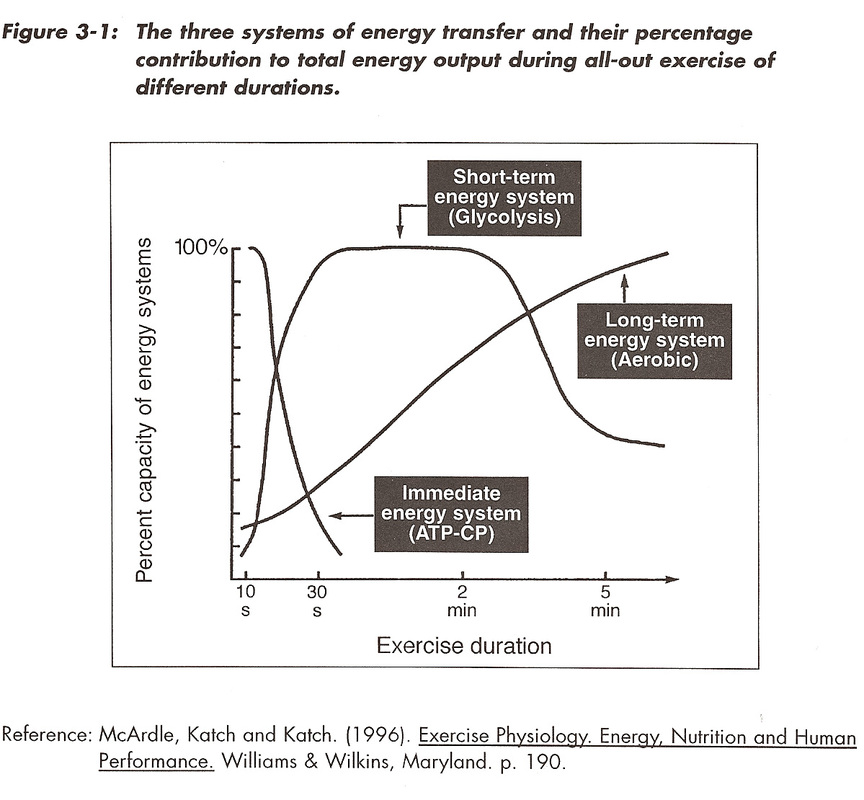
Here’s a quick refresher on the energy system and how we should focus our drills to use it effectively. The anaerobic energy systems are the systems in which oxygen is not required to make energy. They are what fuels our initial movements when we start exercising and they are what work extensively at high intensities. The anaerobic lactic energy system, specifically, is able to generate small amounts of ATP but is also relatively faster at making energy compared to the aerobic energy system. This also holds true for the anaerobic alactic system, the quickest system, which will be the focus of the third and final post on this topic. As stated in my previous post, it takes the aerobic system time to generate energy and so the body uses anaerobic glycolysis to make energy within the first couple minutes of exercise. Put more simply, instead of using oxygen within the cells to generate energy, it is able to produce ATP via a cascade of chemical reactions. The problem with this energy system is the by-product it produces, namely lactic acid, which breaks down into excess hydrogen ions and increases the acidity of the working muscle cells. Why is that a problem? Well, increased acidity causes stimulation of the nerve endings causing pain, decreased muscle contraction and fatigue. Performance suffers! Kind of like hitting a brick wall! When these by-products are accumulating in the body, the tipping point for a lack of a better word is called anaerobic threshold (also closely related and referred to in the literature as lactate threshold and/or ventilator threshold). Without going through the gory details, it is sufficient to say that by training close this anaerobic threshold, we can improve our performance. So how do we apply our knowledge of the anaerobic lactic energy system and anaerobic threshold to our drills? Well, let’s look at the appropriate work to rest ratio, the time it takes our bodies to recovery from anaerobic work. For anaerobic lactic work, we must design sessions with the ratio 1:2 to allow the muscles to recovery and remove (as much as they can) the nasty by-products. Typically, this energy system kicks in at around 15 seconds out to about 120 seconds. Power drills work very well with the anaerobic lactic energy system. By incorporating multiple groups in the drill, you can build in the appropriate recovery for each participant. Let’s take a look on how to set this up. As we start back to classes this Fall, this video not only gives me a giddy belly laugh but it also reinforces how as indoor cycling leaders, we need to expect the unexpected in our classes!
I can’t say I ever had an extreme a case as Dwight but I have had some opinionated participants. As leaders, how do we handle these participants? Are they providing friendly, non-threatening suggestions and enthusiasm or are they trying to sabotage your class? It’s those individuals who are positively engaging with you and others in class that you need to take a second look at! In some cases, I think these types of eager participants want to actually be leaders themselves. How do you identify, encourage and foster a new leader? Can you think of a potential new leader? And don’t feel intimidated to suggest they get certified. If I’ve learned anything over ten plus years in this role, is that there are always way more people wanting to get moving than there are leaders and we need each and everyone we can get to lead group exercise. When you’ve found a promising candidate don’t feel intimidated to suggest they get certified. Who knows? Maybe one day they would be a great sub for your class! As a certified leader, is it not also our role to promote our certifications? I challenge you to find at least one participant this session/term to encourage to become certified, but don’t stop there, act as their mentor! The next time a Dwight arrives in our class we embrace him/her and see what he/she can bring to the role of an indoor cycling leader. Let me know when you find your mentee and how it goes! If they are looking to get certified with the AFLCA, I’m facilitating the cycle designation on October 20, 2012 and would love to have them attend! Enjoy the first couple weeks back in the saddle! Photo credit: futureshape  Dear wonderful network of health and fitness professionals! It is very hard to believe that I’ve been blogging for almost three years! This year is slightly different because officially I am on maternity leave. Don’t get me wrong, I’m not stopping (just on my annual summer break right now) and reaching out to you - current, past and potential readers - looking for your suggestions and ideas. The blog is truly for YOU! And with that being said, What do you want to learn about, read about, and more importantly take away from the blog? I’m working on my annual editorial calendar and would love your input! Here’s what I need from you – simply, email me ([email protected]), tweet me (@medfitconsult), like and post on my Facebook page (Medical Fitness Consulting), or post a comment below of what you want to see on the blog this year. All indoor cycling ideas are welcome! And if you feel like sharing my site and blog with your network, I would appreciate and enjoy sharing my passion for teaching indoor cycling classes! Hard to believe I’ve been doing it for 10 years! I look forward to hearing from and connecting with you! Best, Lisa  As I noted in a previous blog post about the Provincial Fitness Unit`s Fit Rendezvous conference, I attended an excellent session on leadership. Laurel Vespi, personal life coach, presented to the AFLCA Trainers of Leaders on “what it takes to be a great leader”. She utilized the book, The Leadership Challenge* as her platform for our discussions and led the session with great enthusiasm to help us move forward as fitness leaders and the AFLCA forward as an organization. Interestingly, she touched on the top four characteristics of what people look for and admire in leaders. Any guess what they are? |
Workman's Cycle Drills & Skills
Enjoy some of my favorite cycle workout drills either in a cycle class or on your own bike at home! Archives
September 2013
Categories
All
|
Edmonton, Alberta

 RSS Feed