 Do you ever have this nagging pain and you just don't know where it came from? No incident. No accident. No obvious reason to be in pain. That's been me for the past couple months. I've always had back and hip pain of some sort but lately, *Gawd* it's been painful. It's not the normal chronic pain in the butt, literally. But this stiff and sore low back. I can barely look at my toes without pain. Thank goodness for physio because I'm at my wits end with trying to stretch it out. Last week's practice was about self-love; yet, my body wasn't loving me back after my yoga practice! Ouch! Well, we continue on and get a treatment or two and I think we (mostly my physio) have figured it to be my left fascia line down the leg. My heartless IT band, my sad tensor fascia lata and grouchy left foot have made their mark! With last week's trouble, I was hesitant to do another hip sequence but have no fear, I was ready to take on my left leg!!! And it paid off! Fishing the Internet for another yoga practice, I stumbled onto Do Yoga With Me. I clicked on the video, Deep Release for the Hips, Hamstrings and Lower Back, and away I went.  The practice, essentially was all on the floor. It was a nice change from the many sun salutations I have been doing lately. My favourite (and most helpful) portion of the session was the supine hip abductor and hip adductor stretches with the strap. I love this version of extended hand to toe pose (Utthita Hasta Padangusthasana) because a) I can’t do the standing version very well, b) the ground supports the body and c) the strap cradles the foot/leg in its range of motion and allows you to stop to the point of deepest stretch (which may not be the full abduction of the hip).
Since my back is flaring up due to my lateral left leg, the abductors also benefited from the stretch when the leg crossed the mid-line of the body. The cue to “turn the foot in” was essential! That movement got me without even moving the leg across the body. Yikes! In past practices, I have done this sequence before but never really considered it a version of hand to toe pose. It continues to amaze me all the different variations there are to the asanas. Miraculously, after practice, my back felt the best its felt in over a couple months. Yay! I’m so happy to have found another great [Canadian!] website for my home practice. Keep on moving and learning and one day be a teacher, LW
0 Comments
I'm really glad that I was introduced to a yoga eye pillow. Recall, I got on a "I'm make yoga eye pillows for everyone" a couple years back. But what I didn't know was how great they can be off of your eyes too! This week's practice was lead by a substitute teacher. I actually enjoy the variety that having a substitute teacher brings. Different cues, different intro settling the mind, different asana sequencing, and more. And fortunate for me, she taught me how to use the yoga eye pillow a different way.  I settled into corpse pose (savasana) - with babe totally happy to sit and play - and let my body drop into the floor. The music was peaceful and slightly more upbeat than usual but I took the savasana and ran with it.
Fully stretched our, arms and legs, no babe to wrestle nor worry about little hands in my hair, I was actually in the right pose. No distractions! Tip toeing around me is the teacher. I sense she is there but thought she might be entertaining little one. Instead I feel a pressure, a weight into the palms of my hands. It took me aback as I felt my hands, forearms and arms sink further into the floor. How can this be? She had place a yoga eye pillow into the open palm of both of my hands. Brilliant! What a wonderful way to "up the ante" (should we do this in yoga?!?) of savanasa. Who knew that a yoga eye pillow is not just for your eyes! After class, I thanked her for adding the eye pillows to my hands and expressed how much that extra little bit of weight made a huge impact on the pose. Now, I have to get back to making yoga eye pillows. I need a second one for my new found use of these fantastic props! To a new way to practice, LW As another year rolls around, my birthday wish was fairly simple. It's not a significant birthday this year nor do I need much. 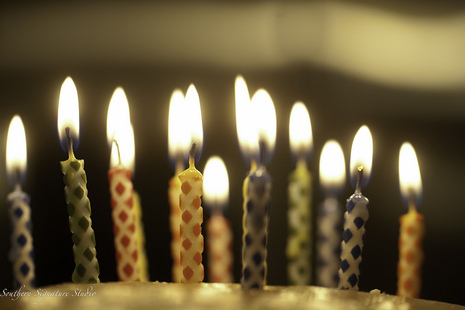
But what was a must-do on my birthday was a yoga class.
I swung my yoga bag on my back and jumped on my bike, pedaling down to my local studio. I knew I had to get out of the house for this birthday wish to come true. I quietly paid and walked into the hot room. My option was a hot class, which is not always my number one choice but nonetheless, it was yoga. When prompted to place an intention for the class, I silently chose to focus on me and only me. This is my one day of the year (and even moreso since becoming a parent!) I lucked out for this "me" practice as the studio space included mirrors. I intently watched each pose (as the pose allowed) and focused on a well-positioned body. Listening not only to the teacher's cues, I also zeroed in on my body cues. Honestly, I must have looked like I was figuring out a hard sudoku puzzle. My face reflected back at me with a very concentrated look. The best part of this birthday wish was a supported savasana. It's like a regular savasana but super sized. Two foam blocks under the hips and head allowed for a glorious torso stretch. I literally and figuratively melted into my body. How do you focus on yourself? Do you use a mirror in your practice? What are ways you honour yourself on your birthday? Are you taking care of yourself? One year older, LW 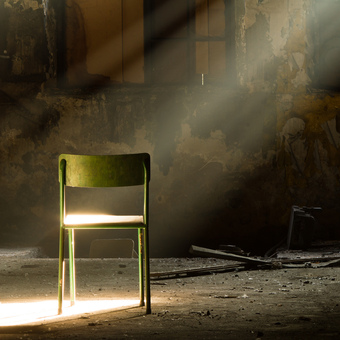
How many yoga asanas that can be done in a chair?
In my early days of practice, I would probably scoff at using a chair, let alone any other prop, with the mentality that it isn't challenging enough. But over time, I've come to the conclusion that yoga can be many things, to many people, at different times. Considering my aspiration is to teach yoga to the physically inactive and possibly chronic diseased, it only makes sense that a chair would be foundational to practice. And, taking it once step further, my ultimate aspiration would be to include yoga therapy in my practice as an exercise physiologist. Whoa! More on that in the future... A chair provided a great foundation for my practice this week. Having to modify asanas is the name of my game right now so let me explain what I experienced this week! I'm the first to pronounce that I love spinal twists. Now, getting on the floor is not pretty these days so I was able to do a spinal twist from a standing position. What? How? By placing my one foot on the base of the chair at a ninety degree angle. I placed my opposite hand on the bent knee and the other hand on the hip. By adding some torque, I rotated my spine away from the bent knee and viola, there was my twist! Now granted it was the same deep stretch I get when doing a reclining spinal twist on the floor (Supta Matsyendrasana), but it fit the bill. The other two poses that were supported this week were downward facing dog (Adho Mukha Svanasana) and modified pigeon pose (Eka Pada Rajakapotasana) stretch. Both allowed for well supported pose with the chair (downward facing dog my hands were on the front base of the chair and external hip rotator I simply sat in the chair and completed the pose). So, consider, what yoga asanas would benefit you this week in a chair? LW In my early days of yoga practice, I have to admit that I was a bit of a props snob. Maybe because of my age or maybe because my body let me do pretty much whatever I wanted, I thought props were for the weak. But within the last five or more years of practice I have gained great respect for all yoga props. As my body morphs into the curvy, anterior ball shape of pregnancy, the use of blocks has been essential to my practice. The two most common types of blocks available are unique and each have there own purpose. Harder wood or foam blocks act more like support as opposed to the softer rectangular foam variety that provide cushion and give. These are my modifications to practice this week using my foam rectangular blocks (still needing to buy wooden blocks for home!): Easy Pose (Sukhasana) & Revolved Head to Knee Pose (Parivrtta Janu Sirsana) As I've stated before, I love sitting on the ground. Yet, to give some relief to my low back, I do like to sit on my block(s). By raising the hips slightly, it causes less tension in the hamstrings and low back. These two poses were much easier with ease in my back! Triangle Pose (Trikonasan) & Extended Side Angle Pose (Utthita Parsvakonasana) Since my body isn't able to twist as easily these days nor bend over as far, I used my block to give some height to the pose. Placing my hand on the flat block, allowed the asana to be less strained than if I tried to reach for the ground. Not here to make leaps in my yoga practice, just wanting to maintain! Deep Squat/Garland Pose (Malasana) Interestingly, it is a day to day variation as to whether or not I can place my feet flat on the floor in deep squat. So on those days I can't, my best option is to place the blocks under each foot so that my heels have something to rest on. The blocks allow me to feel more grounded in a position that can be very tricky to hold and balance! Hero Pose (Virasana) It is nice to have variations for sitting poses. In about 1/8 of my practice do I actually sit in a kneeling position so it is a welcomed change of position. In this pose, I sat on two blocks to minimize the strain on my legs and quite frankly, allow space for the baby! So, who knew that I'd love my yoga blocks so much. When I bought them for home, I was thinking they'd just gather dust. Now, they are a mainstay of my prenatal yoga! Blessed to have my blocks, LW 
34 weeks pregnant!
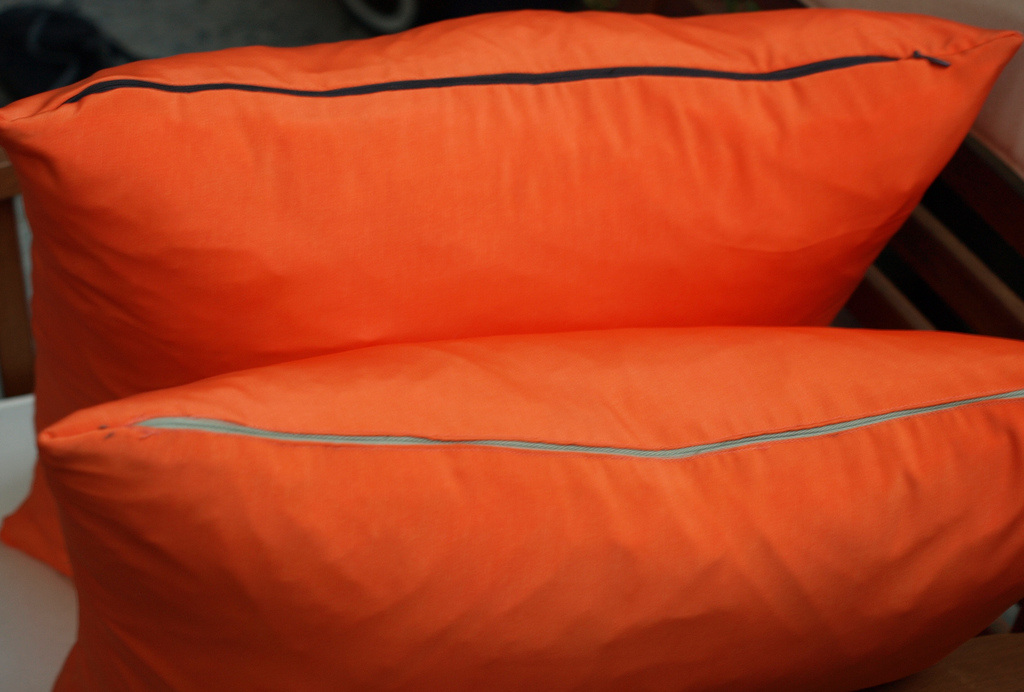
Owning multiple yoga mats and straps is very useful as I've placed my props on both the main floor of our home and basement to allow "spontaneous" yoga as time permits. Well, in this week's case, having to share the house with my husband (what - I have to share!?! :) ), I practiced on the main floor. The only catch is that I don't have many blocks so they reside in the basement where most of my practice occurs.
So, instead of using blocks this week, when prompted by the new teacher and DVD, Yoga for Stress Relief, I used throw pillows instead. I was pleasantly surprised on how well they worked to assist in the poses. I might even have to go as far as saying they may have been more suitable for this practice as they were a welcomed soft place to land my "needed to be supported" body parts! Moving from mountain pose into a forward fold was the first time I was prompted to grab my "block". I opted to three stacked pillows (two firm and one soft) and slowly folded toward them. With flexible hamstrings, I typically can fold pretty far but once my head hit the pillows, it was an interesting sensation. The support of the pillows completely released my head and neck. There was no strain or pull that can sometimes occur when I just do an unsupported forward fold. As the sequence of forward folds continued, I moved into a wide stance forward fold and there too, allowed my head to rest on the pillows. Instantly, my head and neck relaxed again and I was able to focus on my low back and leg stretch than worrying about the "pain in the neck". The most, what I'd say, advanced forward fold that I did with support was a downward facing dog. This was a new adventure for me as I'd never thought to use a block in this pose. The pillows were placed just at brow line and my forehead rested on the pillow. This position was heavenly. The soft pillow allowed my face to sink down and soften whereas if it was a block I'm not sure I would have experienced that sensation. What felt like a second, I was instructed to move on whereas I could have stayed in that position for many minutes! It will be on my hit list to do again soon! The final pose that I did with the pillows was the bridge. The posterior pelvis rests on the block once it is lifted off the ground. I've done this pose in the past in more of a restorative practice and do find the pillows were not firm enough to get the intended stretch and restoration. Out of all the poses, this one would have probably been better with a block. Oh well, you never know until you try. So, lessons learned. Props rock! Pillows can act as a good, if not better prop than a block. And I continually need to be flexible (no pun intended) with my ever expanded and growing practice and journey as a teacher. Oh - and I guess sharing space with my husband should be listed too! How can you use your average throw pillows in your yoga practice? LW I've been yoga prop adverse in the past but have slowly incorporated more props into my regular practice. The more and more I practice, the more I see props place in yoga. Even for someone who is relatively flexible, props allows me to move further and/or relax into the pose. The yoga strap has found it's regular place in my practice. It's been with some trial and error that the strap has found it's place. My inability to loop the strap has been my biggest challenge! :) And as usual I've fished around to get a couple key points about yoga straps. Here's what I found: Typically yoga straps are made of hemp or cotton and are between 6 to 8 feet long. I opted to get two straps with different lengths just to be sure (and honestly, try to encourage my husband to use one to help with his posture!) Duskyleaf.ca states three main reasons to use a yoga strap. #1 - Strap in and Relax Essentially let the strap secure your specific body part into a pose or let the strap carry the weight of your body part to increase the stretch. #2 - Binding your Time Allow the strap to make connections between hand and foot or hand to hand. #3 - Better Blindfolded In the end of practice while in savasana, use the strap just like an eye pillow to encourage the eyes to relax and block out any extra light. What prompted my exploration of yoga straps this week is that I tried a new DVD called Hatha & Flow Yoga for Beginners by Tamal Dodge. During the Hatha portion of the DVD, he uses the strap in many unique ways that I have never tried before. For example, using the yoga strap with the upper body during a modified warrior I pose (seemed to help stack the shoulders over the hips better and engage the arm muscles more) and single leg happy baby pose (allowed for greater hip range of motion). Again, I can't reiterate how much I still need to learn about yoga and how to incorporate the yoga strap into poses. All this work is building on my knowledge and experience to be a teacher one day! LW 
It amazes me how adaptations can happen without even realizing it. After years of practicing yoga, I'm not sure if I truly respect how much my body has "improved", or shall I say, my flexibility and strength has improved. Using props for support has been essential to get into poses that seem challenging.
Adaptation isn't more evident than in deep squat/sitting down pose (Upavesasana) or garland pose (Malasana). Notoriously tight calves, particularly the right, have been my greatest weakness in this pose. I've placed foam blocks under my heels for many years just to get into the correct position. But, I'd have to say over past couple years (maybe increased flexibility of my joints during pregnancy), I've been very capable to flex at my ankles which allows me to get so low! Now that low position has always made me question the pose because of my earlier schooling, is the deep squat not good for the knees? Interestingly, if you ever watch a baby or toddler squat, it is the same position as squat or garland pose. So, with that being said, this pose is probably more innate and natural than a higher positioned "fitness" squat. In searching out more about this pose, I came across some interesting discussions. As noted above, there are two names for this pose. Not to get into much detail, it seems that there has been debate as to how the Sanskrit name was translated. What seemed to resonate in most places was that this pose is related to digestion and excrement (I see how the pose may have been a traditional position to go to the bathroom in!) Physically, the squat position is stretching the low back, hamstrings and calves. Strength is required in the thighs and front of the shins to maintain the pose. I find the arm positioning (hands in prayer position with the upper arms pressing into the fleshy part of the thighs) maintains my balance and stability. I can't think of any other pose that releases my low back in the same way and really relaxes the pelvic floor through gravity. Squatting seems to have many health benefits and particularly helpful for preparing for birth. I recently tried to hold my squat for a minute. Yikes! More time is needed for additional adaptation to occur. The nice thing with the squat is many variations also exist with this pose so options (in a chair, against a wall) and props (blocks, strap, rolled up mat) can help support the pose. Looking for more adaptation, LW Here is a re-post on yoga eye pillows that I wrote back in September. I made an eye pillow for my mom for Christmas and had a request for two more for family members. Maybe you'd like to share a piece of yoga with someone you love during the holiday season! Merry Christmas and Happy New Year! LW 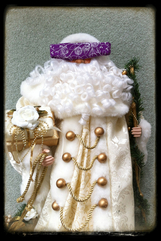 Looks like Santa sure benefits from a yoga eye pillow after travelling around the world in one night!
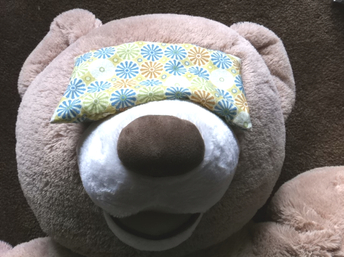 I did it! I made myself an eye pillow!
It has been a godsend this week as I picked up a sinus cold this past weekend. It was a comfort for the eyes and the lavender scent was just what I needed! Now my head doesn't feel as big as Mikey, the bear's head as shown above. I highly encourage that you make or buy one for yourself! LW |
Aspiring Yoga TeacherI've practiced yoga since I was a pre-teen and have always found it to keep me centered. I will be a teacher one day and this is my journey to discover teaching and practice. Archives
April 2019
Categories
All
|
 RSS Feed