|
I was looking forward to workshop #15 as the topic is very interesting to me. Working with people who have multiple joint concerns is typical for me and I see that this is where I’ll likely take my teaching. But interestingly enough, the senior teacher, Edie, make it quite clear that there are few and far between number of people who don’t experience some form of joint pain/injury/concern. When asking the group who has had issues with any of the highlighted joints - neck, shoulders, back and knee - more than 85% of yoga teachers-to-be raised their hand. So really - it’s much more common than I have credited. Even regular seasoned students have joint concerns. On a basic level, we reviewed the major contraindication for each joint. Then followed the contraindication with some alternative ways to do asanas. Here’s what we determined: Neck: limit weight bearing asanas with the focus on releasing the base of the neck as well as the base of the spine 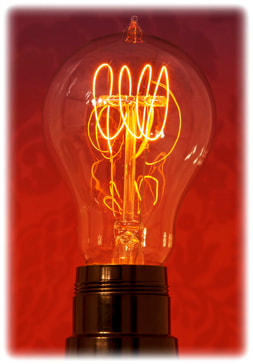 Light bulb burst - Well, that just makes sense! The neck is the extension of the spine! Releasing the back can only help the neck. We worked on coordinating neck rotation with standing arm movements up and down, bridge pose (Setu Bandha Sarvangasana) and single knee to the chest (Supta Ardha Apanasana). The movement of the neck was initiated after the upper/lower body movement AND moving to the opposite side or direction. Shoulders: limited weight bearing asanas with the emphasis on all ranges of motion and asymmetry. A lot of the attention in our practice was to minimize the compression in the shoulders with keeping the arms wide from the body. Further, highlighting the importance of multiple repetitions, going in and out of poses, rather than static holds. Movements, not necessarily asanas, included wall chest stretch with both arms (think of a cop saying ‘put your hands up’) at the walk and rotating the upper body side to side with one arm leaving the wall and side lying external rotation (‘moving the forearm through mud’). Back: limit twists with a focus on side lateral bends instead and asymmetry. Of course, knees bent is essential for protecting the back but also noticing how much the hamstrings want to work. Keeping them at bay can be helpful. For me personally, I have to watch that my glutes, mostly my right, doesn’t fire up. Asanas we explored as side lateral bends options included cresent moon pose (Ashta Chandrasana) and wide leg forward fold (Prasarita Padottanasana) with alternating movements of hands to feet. I really appreciated the emphasis on asymmetry especially for the back. It really put into perspective the alignment of the pelvis and how to continually work on finding good anatomical position. As with any of these joints, it is almost certain that one side is “worse” that the other. Asymmetry helps find the difference and almost acts like a reset button. Knee: limit weight bearing poses with an emphasis on avoiding hyper extension but also hyper flexion of the joint. Having to avoid weight bearing is truly challenging as it removes all kneeling asanas. That is a lot! Yet, flipping the pose around or using a chair can be the most useful way to help those with knee issues. And it goes without saying, adding padding to the mat for the knees to land is an act of self-care! Walking away from this weekend’s training was one thing but the next best thing was practicing in a beginners class the next day. Not only doing my practice but watching the class in front of me. Every type of body, injury, age and sex....and all doing yoga! I challenged myself to watch because these will be the people I will teach. What a lesson indeed! On a final note, I loved how Edie talked about breath. For all the joints listed, the breath is essential to allow for movement. She alluded to the breath as a distraction of fear; fear is what keeps the body rigid, trying to protect itself.  Here are some of her gem of quotes about the breath...
“Breath is... Power. The essence of our practice. Sweetness of yoga. Is your guide, will lead you further than you think.” The combination of learning and observing this weekend has given me a new found confidence in giving options and teaching on the fly when the people are presented in front of me on their mats. LW
0 Comments
Owning multiple yoga mats and straps is very useful as I've placed my props on both the main floor of our home and basement to allow "spontaneous" yoga as time permits. Well, in this week's case, having to share the house with my husband (what - I have to share!?! :) ), I practiced on the main floor. The only catch is that I don't have many blocks so they reside in the basement where most of my practice occurs.
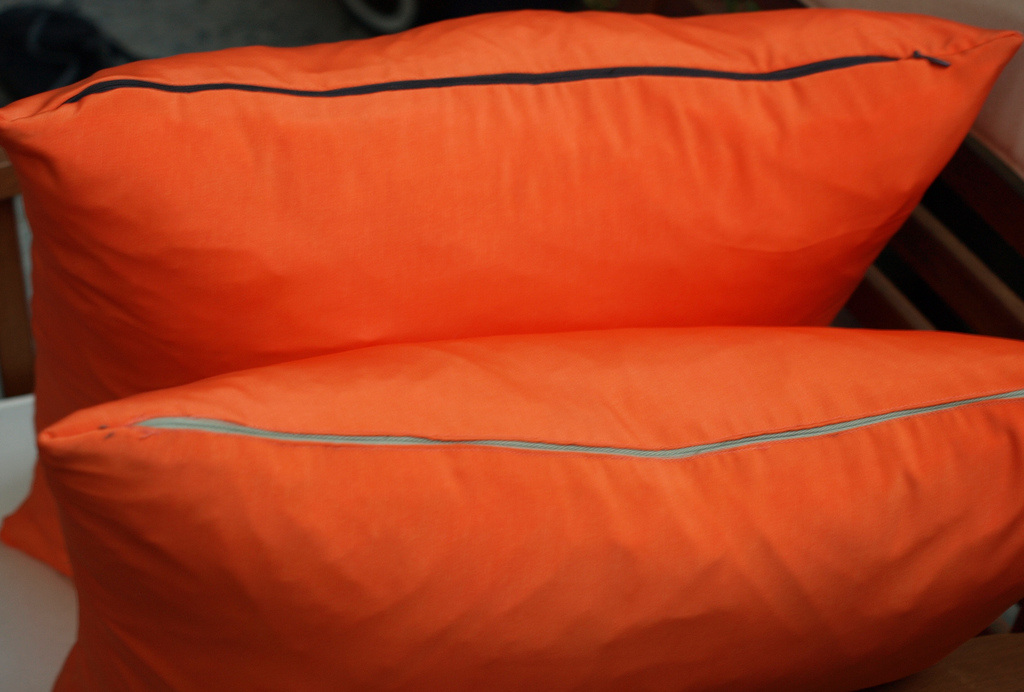
So, instead of using blocks this week, when prompted by the new teacher and DVD, Yoga for Stress Relief, I used throw pillows instead. I was pleasantly surprised on how well they worked to assist in the poses. I might even have to go as far as saying they may have been more suitable for this practice as they were a welcomed soft place to land my "needed to be supported" body parts! Moving from mountain pose into a forward fold was the first time I was prompted to grab my "block". I opted to three stacked pillows (two firm and one soft) and slowly folded toward them. With flexible hamstrings, I typically can fold pretty far but once my head hit the pillows, it was an interesting sensation. The support of the pillows completely released my head and neck. There was no strain or pull that can sometimes occur when I just do an unsupported forward fold. As the sequence of forward folds continued, I moved into a wide stance forward fold and there too, allowed my head to rest on the pillows. Instantly, my head and neck relaxed again and I was able to focus on my low back and leg stretch than worrying about the "pain in the neck". The most, what I'd say, advanced forward fold that I did with support was a downward facing dog. This was a new adventure for me as I'd never thought to use a block in this pose. The pillows were placed just at brow line and my forehead rested on the pillow. This position was heavenly. The soft pillow allowed my face to sink down and soften whereas if it was a block I'm not sure I would have experienced that sensation. What felt like a second, I was instructed to move on whereas I could have stayed in that position for many minutes! It will be on my hit list to do again soon! The final pose that I did with the pillows was the bridge. The posterior pelvis rests on the block once it is lifted off the ground. I've done this pose in the past in more of a restorative practice and do find the pillows were not firm enough to get the intended stretch and restoration. Out of all the poses, this one would have probably been better with a block. Oh well, you never know until you try. So, lessons learned. Props rock! Pillows can act as a good, if not better prop than a block. And I continually need to be flexible (no pun intended) with my ever expanded and growing practice and journey as a teacher. Oh - and I guess sharing space with my husband should be listed too! How can you use your average throw pillows in your yoga practice? LW 
Has your life been a bit busy lately? Does it feel like its ramped up a notch? Are you feeling September fatigue yet?
Sad to say it, but I'm feeling it! For whatever reason, the slow paced summer has turned into the scheduled (over scheduled?) September and I don't even have children in school yet! I'm feeling the hustle and bustle and busyness of the Fall. So this week, I'm venturing into some of the therapeutic aspects of yoga. And asking the question, "what is/are the best yoga poses for fatigue?". Oh google, my friend, don't let me down! The top three (i.e., most common poses or yogic techniques) are as follows: 1. Bridge (Setu Bandha Sarvangasana) or Two Legged Table (Dwi Pada Pitham) I started my fatigue lifting practice this week with bridge. A supine back extension is a back strengthener but also a chest opener. I initially started with my hands on my mid back to support the position but found having my shoulders folded back with my arms straight (under my torso) was a better position for me. In the pose, I had time to contemplate, why was bridge recommended to cure fatigue. After practice and some reading, it realized that since it is such an opening pose, it allows for unrestricted breathing. And in some respects, taps into the three different locations of breathing considered in yoga (I don't fully understand that to date so I'll explore it in more detail in another post...). And beyond breathing, in Timothy McCall's book, Yoga as Medicine, he notes that bridge is thought to help with heart disease, via the assistance in developing collateral blood vessels. But of course, this is not necessarily backed by research evidence. Interesting nonetheless. 2. Wide Stance Forward Bend (Prasarita Padottanasana) I continued my practice with wide stance forward bend. I have to admit, this is one of my favourite poses. It is in almost direct opposition to bridge so it counteracted well in the sequence I followed. Being a forward bend, the back and hamstrings are stretched and the release is awesome (especially when you've got the flexibility). The only challenge was in the full pose, one's head rests on the floor. I have to admit, having a block with me would have made the pose better, but as time progressed I was able to get my head to the floor. Again, thinking about how does this pose relieve fatigue, it dawned upon me that it is all about blood flow to the brain. Gravity is a huge help to let blood come back to the brain in this pose. More blood equals more oxygen which equals energy. Pretty cool how this works! |
Aspiring Yoga TeacherI've practiced yoga since I was a pre-teen and have always found it to keep me centered. I will be a teacher one day and this is my journey to discover teaching and practice. Archives
April 2019
Categories
All
|
 RSS Feed