|
Have you ever attended an indoor cycling class where someone was wearing a wig, or a tiara, or even a cape? Well, I have and I encouraged it! Yes folks, it's that time of year again when adults get to play dress up, at least in my classes, and we play Thriller by MJ for the whole class! What will you do with your class this year? Here's one idea (want more ideas? Check out my previous posts here and here on Halloween games) using homemade Trick or Treat cards. This is an easy way to incorporate “tricks” (i.e., challenging drills) and “treats” (i.e., easier drills). Simply have participants pick a card, either trick or treat, and the predetermined drill assigned to that card will dictate what drill is performed. I’ve decided to have six possible tricks and three possible treats. Possible Tricks: 1. Two minutes of jumps with 30 second break; repeat two to three times 2. Two one minute standing hill climbs and a couple two minute standing hill climbs; 15 second recovery between each climb 3. Five one minute sprints with 30 seconds recovery between each sprint 4. 15 squats off the bike followed by one minute of seated hill climb; repeat two times (be watchful of participants’ footwear particularly if they are wearing cycling cleats) 5. 10 sprints for 15 seconds. Recover for 45 seconds. 6. Attack the pack power! Six intervals of seated power for 30 seconds, recover for 30 seconds Possible Treats: 1. Standing jog/ride for two minutes 2. Meet your neighbor spin out. Participants discuss best and worst Halloween costume they ever wore for three minutes. 3. Steady time trial pace for six minutes singing to the song everyone knows the words to, Thriller (the album version is 5:58) After you've constructed your family’s costumes and your Halloween decorations, it's easy to whip up these trick or treat cards. Here's how I did it:
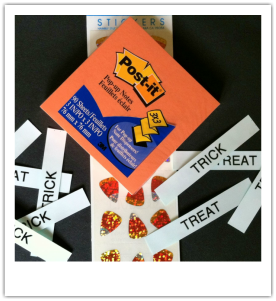
Step one: collect crafty items such orange post-it notes, black card stock, "trick" (6) and "treat" (3) labels, and fun Halloween pictures or stickers.
1 Comment
Well, maybe not literally, but it might be something to consider. Why not set your bikes up in a circle? This may be just what participants need to spice up their ride.
When the class is in a circle, it changes some fundamental class dynamics: 1. participants who usually sit in the back row are no longer able to hide! 2. participants can interact with others who they may not have in the past 3. allows for a chance to see other participants face to face 4. provides an opportunity to see mirrored riding technique and the opportunity to match cycling biomechanics I have to be honest, some participants are not a huge fan of the circle set-up. Especially those that like to hide in the back! Here are some circle drill ideas that you can try. I encourage you to use your imagination and design your own! 1. Chain Reaction Wave Starting in a seated position (moderate resistance, 80-90 rpm), initiate a standing position. Remember to add resistance when standing! As you stand, the participant on your left stands, followed by the next and the next, until the whole circle is standing. After a moment or two, as the participants become comfortable, start the 'chain reaction' again by sitting. Alternate between standing and sitting while remembering to cue the proper level of resistance and cadence. Encourage others in the circle to initiate the 'wave'. Participants need to stay aware and use their peripheral vision to watch for changes. 2. Cross Circle Partner Challenges Have participants chose a partner across from them in the circle. For two minutes, pairs are challenging their partners with hills, sprints, power, seated, standing, steady state drills. Encourage 'jockeying' for lead but allow for each partner a chance to dictate the ride. This drill encourages participants to keep facing forward, watching their partner's next move. Cycle participants usually push themselves much harder than you as the instructor would push them! Over time, increase the duration of the challenge to upwards of 5 minutes. It is also advisable to switch partners, allowing other participants to push each other in a different way. Some participants are stronger at hill climbs while others like sprinting. Changing partners forces each participant out of their comfort zones! I’ve been working on a workshop for the upcoming 11th Annual YMCA Spring Training Conference on reinventing your spin classes and a word keeps coming up as I put it together: creativity. A colleague and friend of mine forwarded me this and wondered what thought! Take a peak! Not to give away what’s in store for the upcoming workshop, what can we learn from these daring acts on the bike? Let’s put on our creativity hats...
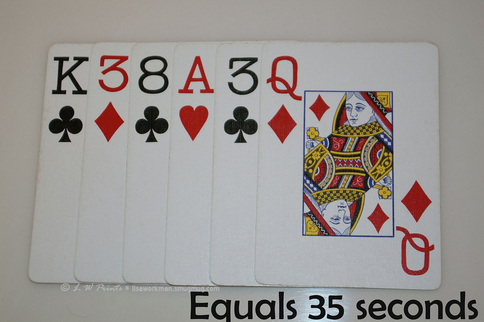
· A couple words come to mind – enthusiasm and energy. How do you bring these two attributes to your classes? · The use of percussion and sound cues with clapping. The individuals are using clapping to set the rhythm and beat in the song. Could you add another layer of cuing to the music you use? · Pedal cadence is consistent with the beats per minute (bpm) in each song. For example, in the first video, the song is 150 bpm and the cyclist is pedalling between 75-80 rpm. Look at how effective the music is setting the intensity and pace. Do you use the bpm of your songs to dictate cadence in your classes? · Synchronization! Matching partner or group leg movements were set. This is a great way to foster teamwork in your class. How could you promote synchronization in your classes? · It is all about taking your cycle participants out of the norm for a spin class. How can you do this? Well, bike placement might just do it. The second video demonstrates a pace line option. Now, I don’t recommend the bounding over the bikes, but perhaps this could be the inspiration for participants rotate through bikes in a safer way? How can you shake it up for your cycle participants? · Just like a round in music (two or more voices sing exactly the same melody, starting at different times), the cyclists in the second video glide into a round on the bike when each move from sitting to standing starting at the next phrase in the racing music. When can you include a round in your drills? · Did you catch the theme in the last video? Kevin Bacon in a tight white shirt and jeans bring anything to mind? The cyclists are ‘dancing’ to the song Footloose on their bikes. Decked out in tight white shirts (minus jeans of course) and tapping their feet just like some of the moves from the movie. Now it maybe that we won’t ‘dance’ on the bike (although that might even be something to consider) but think about themes for you classes. What themes would interest your cycle participants? Now I would be neglectful if I did not mention that some of these moves are not particularly safe for many (if not all) of our cycle participants. Uncontrolled high cadence, lifting the stationary bike off the ground, standing on the handle bars, uncontrolled single leg work, the v-sit on the saddle, and clap push ups are not recommended in a regular spin class. So maybe don’t try this at home or in the studio with participants. Let’s look at these videos more as a spectacle versus functional training, but anything can be the inspiration for a great spin class! Keep creative! In my last blog post, I discussed how to use a simple deck of cards to jazz up any indoor cycling class. Since there are many ways to play with the cards, I’ve come up with two other drills that can raise the stakes and ace the workout! Drill #3: Using the Suits to your Advantage Have you ever wanted to put cycle participants into groups? Using the deck of cards, the suits will help you randomly assign groups. Pass out a card to each cycle participant (place in front of the bike or simple attach an elastic band to each card and affix to the handlebars). Since there are four suits you can split the group into four distinct groups. Determine four different drill types (e.g., seated hill climb, standing hill climb, seated down hill, seated flat) and call out which group is to do what drill. For example, all those cycle participants with hearts are to complete a standing hill climb. Rotate the drill types through each of the groups for a total of four minutes (one minute for each drill). Alternatively, use the colour of the suits to break a large group into two smaller groups. Alternate work and rest between the two groups. For example, all those cycle participants with black suits are to complete seated power drill for 30 second while those with the red suits are in active recovery. Drill #4: Add it Up! Similar to last blog post, use the values of the cards to determine drill duration but use the rules of Blackjack. Instead of you as the Group Fitness Leader listing the duration from the cards you pull, have cycle participants in each row, usually four to eight people long, add up the total value of their cards. Again, distribute the cards to each cycle participant (as described above). For example, in the studio I teach in, I have six rows of six to seven bikes (approximately forty bikes). Each row of cycle participants is randomly picked to add up their cards and the whole group proceeds to complete a drill for the assigned duration. Here is a refresher to Blackjack rules: Ace to 10 cards = 1-10 points/seconds Face cards = 10 points/seconds For example, a row of 6 cycle participants have a king, 3, 8, ace, 3, and queen. That would equal a 35 second drill. After each row has had a chance to add up their cards and the whole group does a pre-assigned drill for that duration, consider shuffling the cards and starting over. Feel free to pick a second drill type for the next round. The duration of all the drills will be totally random or at least the probability of the same cards being pulled would be very low! Consider “hitting” the class with a “double down” and see who will “bust or break”!
Got other ideas how to use a deck of cards in an indoor cycling class? Post your ideas! Did I get your attention? Aren’t diamonds a girl’s best friend? Well, I’m not giving away any freebies this blog post, especially not diamonds; but I am giving you a new outlook on how to include a deck of cards, yes a deck of cards, of all things, in your cycle classes. Take your standard deck of cards, 52 cards to be exact. You’ve got your four suits each with an ace, king, queen, jack and cards two through to ten. Now depending on your deck, you may have one to four jokers as well. So many cards and so many things you can do with the deck to spice up you next cycling class. And think, how many card games you know that you could ‘play’ in a cycle class? Drill #1: Pick the Number, Pick the Duration
Take a typically drill (e.g., hills, power, sprints) and let the deck dictate the duration. I typically use only the number cards (tack an extra zero on the end of the number to equal seconds) with random jokers in the deck. For example, I pull a three of spades and thus the group needs to do 30 seconds of the drill. Now, if I pull a joker, it is a random card and I let the group yell out the duration. Watch those highly motivated cycle participants yell out a 10; thus, the drill is for 100 seconds! To keep the cycle participants engaged, pull four cards from the deck. The first and third cards are the duration of the drill and the second and fourth cards are the recovery duration. Boy, you can sure get some mismatching happening in which cycle participants can get more work than rest! Drill #2: Numbers Count - Jumps and Lifts Using the whole deck of cards, randomly distribute a card to each cycle participant. Since the cycle participants could receive any of the potential cards in the deck, ensure that you announce what each cards represents. Of course the number cards would be pretty self explanatory but say face cards are worth 15 jumps/lifts and all jokers are worth 20 jumps/lifts. Throughout the class, call on participants to reveal which card they have and follow their direction on how many jumps/lifts the class is to complete. Expect to call on at least five separate cycle participants to help dictate the number of jumps/lifts the group is to do. Alternatively, depending on your duration of jumps/lifts (four, eight, or sixteen beats of the music or using stop watch every 10 seconds) you may need more or less cycle participants to participate. Now who knew that a simple deck of cards would be so handy in a cycle class? Stay tuned for part two, of Diamonds, Hearts, Clubs, and Spades… With the holiday season upon us, how can we incorporate the festive season into our indoor cycle class? The simple answer would be to include holiday music in our mix of songs. Many of the big fitness music suppliers have seasonal music set to the 32 count, such as Power Music, Dynamix Music, and Yes! Fitness Music. But, is there a more creative way to get your cycle participants into the holiday spirit? Since we always begin with a warm-up, let’s start there! Get your reindeer antlers on! Picture courtesy of Microsoft clipart Set the scene for your cycle participants by indicating they are one of Santa’s reindeer (now it is time to imagine!) and it is a snowy Christmas Eve pulling Santa’s sleigh around the world. Have cycle participants get themselves set to a moderate tension in a seated position to start. Here are some suggested ways to get cycle participants warming up: 1. To avoid clouds, cue participates to add tension and stand up into a standing hover position while they dodge clouds (slide upper body from side to side). 2. To land on rooftops, cue participants to sit down on the saddle while they add tension and sit back as if the reins are being pulled back. 3. To drop presents from the sky, cue participants to sit down and set tension low as if descending quickly over rooftops (similar to a downhill ride). 4. It’s close to the end of the night and Santa needs to go faster, cue participants to perform a seated sprint. Use a combination of the above suggestions and/or makes up your own version of what reindeer would need to do to get Santa around the world on Christmas Eve! Nothing says the holiday spirit than giving. Consider gathering donations (food for the Food Bank, toys for Santa’s Anonymous or money for the Salvation Army) from your cycle participants. Just double check with your venue to ensure this is something they are okay with. And maybe next year plan for a donation drive for the whole month of December. Wishing you the best of the season, Merry Christmas! -Lisa
I like to have cycle participants engage with one another, particularly when they are in a registered class. It is nice to make the group feel more like a community rather than separate individuals coming to a single fitness class. It is actually part of my role with Campus Recreation at the University of Alberta to promote community. Their mission speaks about it loud and clear: “To create a sense of community through quality recreation programs at the University of Alberta and in the community beyond the University”.
Thus, I like partner drills. This drill truly is a balancing act between the partners as they are required to complete a power drill that is short but also try to ensure their partner has adequate rest time as well. Let me explain... Partners are required to maintain a power drill for a total of three minutes between them. As we know, power drills are intense and tap into the anaerobic lactic energy system. Each partner takes a turn completing the work while the other partner takes a recovery ride. As power is intense work, each partner may only be able to maintain the drill for say 60 seconds at which point they signal to their partner that it’s time to switch. Over the three minute period, partners may swap up to three or four times depending on each others’ physical fitness ability. So how do you cue this Lisa? Well, I typically count out the time in 15 second blocks. This allows participants to complete their part of the drill in 15 second increments (i.e., 15 seconds, 30 seconds, 45 seconds). Now, for your beginner groups, try two minutes to start and slowly increase the duration as the class progresses. And for your advanced riders, try five minutes. Be sure to explain that they are working with a partner and they may need to take up the slack at times when their partner needs an active recovery. Feel free to use seated power work and standing power work for this drill. It is nice to hear cycle participants interact on the bikes. I enjoy hearing the giggles, groans, and high fives as they connect with a fellow cycle participant. Do your cycle participants groan when they hear sprints? It’s time to liven up sprints by adding an imagination component. I usually cue cycle participants to put on their imagination hats and get ready for the main event.
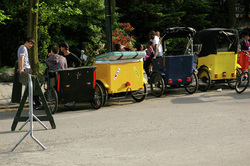
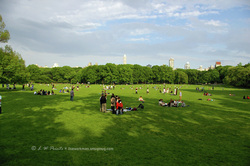
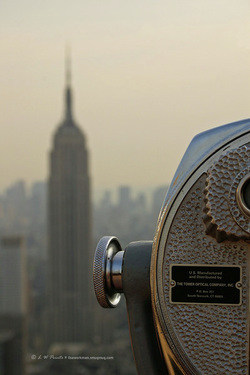
Wikipedia states that imagery is the “usage of details and descriptions in order to create a sensory experience”. As group fitness leaders we are able to transport our cycle participants to new and exciting places, particularly when they need to sprint. In a cycle class, imagery can: · Set the mood (excitement, enthusiasm, competition, to name a few) · Define a focus and purpose to the drill · Allow for mental distraction to get through a difficult drill Over the many years I’ve been teaching, I’ve come up with various images associated with sprinting that help cycle participants push past their limits. Typically, each sprint is for one minute with one to two minutes active recovery between each sprint. Here are some of my favourites. General themes 1. Visualize yourself racing a childhood friend (add situational cues of your childhood bike) 2. Visualize yourself racing a family member (we always have one family member we are slightly competitive with) 3. Visualize yourself in the Rocky Mountains and you are being chased by a grizzly bear! Sport themes 1. Visualize yourself racing your greatest competition (particularly when working with a sports team, have athletes picture their competition) 2. Visualize yourself racing for the last spot on the Canadian National Cycling Team (the coach is on the sidelines timing your sprint and you need to impress him/her) 3. Visualize yourself racing in first place with a competitor on your back wheel (one minute to the finish line!) Lifestyle themes 1. Visualize yourself racing to a store full of the newest and greatest video systems (e.g., Xbox Kinect) or video games (e.g., the newest Halo) and you’re after the last copy 2. Visualize yourself as a bride-to-be and you are racing into the wedding dress discount sale that happens only once per year (if you’ve never seen the racing heart rates of brides-to-be, check out this video) 3. It is December 26 and you’ve been waiting since 4 am to get inside your favourite electronic shop to get your overlooked Christmas gift, that big screen TV. Visualize yourself rushing the front door and heading straight for the TV section to find your prized gift. Holiday themes As it being Halloween today, I would be remised not to mention a Halloween themed sprint. 1. Visualize yourself trying to exit a haunted house but can’t find the door. Frankenstein appears as you race out of the house, down the stairs and out into the dark of night (okay, so maybe I’ll never be a thriller book author!) 2. Visualize yourself as the lead reindeer on Santa’s sleigh and you must hurry to deliver presents for Christmas 3. Visualize yourself as one of Santa’s elves who is responsible to get all of the presents onto Santa’s sleigh on December 24 I’ve provided some examples that will engage your cycle participants to sprint their hardest to reach their goal. Make up your own that best suits your class. When I listed the benefits of imagery, I neglected to say that it also makes the sprints FUN! Always finding ways to engage, encourage and provide a place for play is our goal. Now go out and get your class sprinting! As part of my summer vacation, I was surprised with a trip to New York City. I was there last year only for a couple days and I knew I just had to get back to see all the sites. I was fortunate to spend a full day in Central Park and enjoy all the sights and sounds. I would love to share with you a ride in Central Park (and some of my pictures). Just a bit of background ...the park was completed in 1870 and spans 843 hectares (think – Edmonton’s Hawrelak Park [at 130 hectares] times eight). It is huge! Around the park there is Central Park Drive which is open to walkers, joggers, roller bladders and of course, cyclists. Riders are a diverse group from seasoned cyclists to tourists riding rental bikes for the day. And I can’t forget the bicycle taxis! Central Park Drive is a 6.03 mile (9.7 km) loop around the park. Set the scene by mentally taking your class participants to the park by picking the time of year (e.g., beautiful autumn leaves on trees or hot, sweltering days of summer). List things that they may see on their ride such as the outside of the Metropolitan Museum of Art (The Met), horse drawn carriages, lots of trees and wildlife such as extra large squirrels, numerous bodies of water (the Jacqueline Kennedy Onassis Reservoir), and of course, the world famous Great Lawn. Instead of being one of the wide-eye tourists with cameras hanging around their necks, your cycle participants are the bicycle taxis drivers (see above picture) that drive tourists around the park. Cycle participants pick up a single tourist at the south east tip of Jacqueline Kennedy Onassis Reservoir (right by The Met) and he requests a ride around the Reservoir, which is 1.58 miles (2.5 km). Assume cycle participants ride at 25 km per hour, the loop will take 7.5 minutes to complete. What cycle participants don’t know that the loop varies in terrain and there are surprises on the way! Start heading north on the east side of the Reservoir. 0-1 minutes: slight incline to the terrain; add tension stay seated 1-2 minutes: seated time trial/steady pace with one tourist 2-2.5 minutes: you run into large group of runners who are taking up most of the road; you need to dodge runners by adding tension and riding out of the saddle 2.5-3 minutes: tourist is not happy with your swerving and requests to get out; light tension on the flat 3-4 minutes: two female tourists pick up the ride at the north end of the reservoir with many heavy shopping bags; add tension to compensate for extra weight; push hard! 4-4.5 minutes: the path curves and you meet up with other bicycle taxis; to show off your excellent cycling ability, you start to pick up the pace and move into standing jog 5-5.5 minutes: you round the northwest corner and leave the other bicycle taxis behind, keep the same tension as above but sit down into saddle, remember you still have the two tourists 5.5-6 minutes: two tourists request to get out as they are heading to the Upper West Side, you let them out and turn tension back to seated time trial/steady pace with no tourists; Freedom! 6-7 minutes: you are waved down by a family of three that want to squeeze into your small carrier. They insist so you let them in. Turn up the tension and stay seated. Hold the pace to pull them to the finish of the loop. 7-7.5 minutes: You hope and pray the family wants to get out at the Great Lawn and hurry pedal your feet (increase speed) only to run into a horse and carriage that makes you want to speed even faster (increase speed). Unfortunately, the family won’t get out at the Great Lawn and you race back to the Met and drop them off with a huff and a puff! Feel free to modify your ride as required with the well detailed map of the Park. Why not include some New York City Themed songs. Here is my list: Empire State of Mind – Jay-Z and Alicia Keys (censored radio version) I Love New York – Madonna NY minute – Mobile New York Minute – Eagles (good cool down song) New York City Boy - Pet Shop Boys Sex and the City Theme Song Theme from New York New York – Frank Sinatra New York Groove – KISS New York – U2 New York City – Boney M New York is My Home – Ray Charles Or check out more options on Wikipedia. I HEART NYC!
I love my birthday (quite frankly, what I call my birthday week) and in honour of our nation’s birthday, I would like to share a couple ways to use the theme “birthdays” in a cycle class. 1. Throw a birthday party! Invite cycle participants to celebrate a birthday, such as Canada Day. Have birthday games (you remember your childhood favorites such as Pin the Tail on the Donkey) and modify them into cycle drills, decorate with streamers and balloons, and provide party hats. Consider having prizes or “goody-bags” at the end of class for all those who attended. And don’t forget to play the song “Happy Birthday”. 2. A less involved way to incorporate the theme “birthdays” is using birth month to group cycle participants. It is an easy and quick way to separate the class into distinct groups. Regardless of what drill you want to do with class participants, calling out a month of the year, cycle participants who are born in that month will respond without even thinking! When grouping, I would suggest three or four groups, which include either three or four months together (e.g., cycle participants born in January, February, and March participate together). 3. And finally, for registered classes where you could access participants’ birthdays, consider at the month end, celebrating the birthdays. What a great way to make participants feel special in their birthday month! My countdown is on as my birthday week is fast approaching. Enjoy Canada Day! Picture Courtesy of: Edmonton Journal ~~~~~~~~~~~~~~~~~~~~~~~~~~~~~~~~~~~~~~~~~~~~~~~~~~~~~ ~~~~~~~~~~~~~~~ P.S., As we roll into the summer months, my blog post may become fewer as I will be out on my bike enjoying the nice weather. Don’t worry - I am cooking up more blog post ideas for the Fall! Happy Summer! Happy Riding!
|
Workman's Cycle Drills & Skills
Enjoy some of my favorite cycle workout drills either in a cycle class or on your own bike at home! Archives
September 2013
Categories
All
|
Edmonton, Alberta




 RSS Feed